Friday, December 20, 2013

All Things 2013 Holidays


This year Holidays baking has been a blast.

Camden just turned four years old, and he wanted to help me bake more. Even asked me a few times if he could bake something like gingerbread cookies.

We made a lot of gingerbread dough that we were able to play around with the cookie cutters. We made gingerbread farm animals and gingerbread reindeer. I actually liked the cookies plain, but Camden preferred them with the all natural sprinkles.

There were many cold days that really called for a warm drink. Hot cocoa topped with marshmallow fluff and drizzled with melted chocolate. Yeah, take it to the next level of something sweeter.

And to top that off, I decided to fry dough for my kids' afternoon snack. Dredge them in powdered sugar!!! Hello, sweet snowy powder goodie-licious!!!

Just yesterday, Brek asked for a chocolate cake for afternoon snack. I baked chocolate cupcakes instead for time saving. With powdered sugar on top, they looked like snow on the chocolaty cupcakes.

Today, I showed Brek the reindeer Oreo pops I saw on Pinterest. We decided to make them together as an afternoon homeschool activity.

No recipe. No instructions. We just kinda winged it. They turned out pretty scary lookin'. Their antlers just didn't take the right shapes. We had a good laugh too.

We used Newman's O cookies, melted Enjoy Life chocolate chips, Sun Drops candy, and organic jelly beans. Scary but oh so good in our tummies.

Brek's reindeer was the one with a smile. Camden's reindeer had dark red jelly bean nose. The other one was mine.

So I will end the year 2013 of cooking and baking with this post. Happy eating something sweeter!!! Happy Holidays!!! And all the sweet stuff yet to come!!!

Click for the recipes:

Gingerbread Cookies

Marshmallow Fluff (to top the hot cocoa)

Chocolate Cake

Saturday, December 14, 2013

Chocolate Chip Cookies (dairy free)

Isn't it obvious that I have to post a chocolate chip cookies recipe? Seriously though. Chocolate chip cookie is the classic snack, dessert, or breakfast. Yes, you read it right. Breakfast. Just you wait!!!

From all of the chocolate chip cookies I tested, William Sonoma's recipe turned out best. Of course, I had to modify their recipe to fit my kids' allergy free diet. "Gone" is the butter at room temperature. "In" is the coconut oil or coconut butter.
 
I found a coconut butter at Whole Foods. But it is super duper expensive. I tested my chocolate chip cookie recipe, using both coconut oil and coconut butter. The cookies tasted the same, but I noticed the coconut aroma was stronger in butter than in oil. With that said, use the ingredients that are safe for your diet and within your budget.

Chocolate Chip Cookies (dairy free)
adapted from William Sonoma's chocolate chip cookies
makes about 3 dozen cookies

1 1/3 cups (6.8 oz) all-purpose flour
1/2 tsp. baking powder
1/2 tsp. baking soda
1 large egg
1/2 cup (3.5 oz) granulated sugar
1/2 cup (3.5 oz) light brown sugar
1/3 cup (3 oz) coconut oil or coconut butter
1/2 cup (3 oz) chocolate chips
  1. Line the baking sheet with parchment paper or nonstick mat.
  2. In a small bowl, shift together the flour, baking powder, and baking soda.
  3. In a large bowl, beat the egg with sugar, using an electric mixture at a medium speed.
  4. Add the coconut oil or coconut butter and beat until creamy.
  5. Add the flour mixture and combine on low speed.
  6. Add the chocolate chips and mix until they are folded into the dough.
  7. Using a medium scooper, scoop the cookie dough onto the prepared baking sheet, making sure the cookies are 2 inches apart.
  8. Flatten each cookie dough to about 1/2 inch thick.
  9. Place the cookie dough in a freezer for at least 30 minutes.
  10. Preheat the oven to 350 F degree.
  11. Bake the cookies until golden brown, about 12 minutes.
  12. Allow the baked cookies to cool for at least 5 minutes then transfer them to a wire rack to cool completely.
Note: These chocolate chip cookies can be kept in a tightly lid container at room temperature for up to 3 days. Keep the cookie dough in a freezer for up to 3 months. There is no need to thaw the cookie dough, but the cookies will need to bake a few minutes longer, about 15-17 minutes total. I usually bake the frozen cookie dough for 12 minutes, turn off the oven but leave the cookies to bake longer. Check every minute until the cookies are golden brown.
 
William Sonoma's chocolate chip cookies recipe I adapted from is not posted on their web site, but their book is called William Sonoma Collections: Cookies.
 

Optional: Add the same amount of chocolate chunks instead of chocolate chips for a robust chocolaty taste. If you can have nuts in your diet, add 1/2 cup (2 oz) of your preferred raw or toasted and chopped nuts. Mix in about 1/2 tablespoon of ground flaxseeds. Now you can have these cookies for breakfast because they are now healthy for you. Told you these cookies are meant for breakfast.


Saturday, December 7, 2013

Gingerbread Cookies

I was in the mood for baking but couldn't decide what to bake. So I posted a question on my Facebook page and asked my friends what they were craving for. They suggested gingerbread cookies. Seriously, I'm just suck when it comes to shaped cookies. Most of my shaped sugar cookies turned out to be a big blob.

I've read many Holidays books to my kids as our nighttime routine. One of the books was Maisy Makes Gingerbreads. While I was reading it, Camden kept saying, "Ouuu, I want to do that!" After reading my friends' suggestion on gingerbread cookies, I decided to give the shaped cookies another try.

After flipping through Holiday cookbooks, I decided on a recipe that might work. The cookies turned out better than I expected. Very tasty. The shapes? Well, not so much. But as long as they tasted great, right? Plus, it was my kids' homeschool baking activity. Lotsa fun for us.

I used my food processor to mix the cookie dough. But the dough can be mix by hands. I only use a food processor because Camden was helping me. It was more fun for him to "pulse" the dough with faster result and with less mess. Keep in mind that I used cold butter in this recipe. If you cannot have cow's milk, substitute the cold butter with cold (but not hard) coconut oil. The reason for cold ingredients is the make sure the dough is easy to work with. I made this cookie dough the same I'd make pie dough.

Gingerbread Cookies
makes a lot of cookies, depending on the shapes
adapted from Good Housekeeping The Great Christmas Cookie Swap Cookbook: 60 Large-Batch Recipes to Bake and Share

3/4 cup (5.3 oz) sugar
1 1/4 tsp. ginger
1 tsp. ground cinnamon
1/2 tsp. ground cloves
1/4 tsp. ground nutmeg
1 1/2 tsp. baking soda
2 1/2 (10 oz) all purpose flour, extra for dusting
1/2 cup (4 oz) cold butter, cubes
1 egg, cold
1/4 cup (3 oz) molasses 
  1. In a food processor, add the sugar, cinnamon, cloves, nutmeg, baking soda, and flour.
  2. Pulse 5 times to combine.
  3. Add the cold butter.
  4. Pulse 15 to 20 times until the dough resembles small pebbles.
  5. Add the egg and molasses.
  6. Pulse until the dough forms into a ball.
  7. If using the dough right away, place it between two parchment papers.
  8. Sprinkle the all purpose flour onto the dough then roll it out to a quarter inch thick. Tip: I use dough rings or rolling pin spacer bans to make sure the rolled out dough has exact thickness for even baking.
  9. Place the all purpose flour in a bowl. Dip the cookie cutters into the flour to ensure the dough won't stick onto the cookie cutters.
  10. Press the cookie cutters into the dough and then left them up without disturbing the patterns.
  11. Freeze the dough for at least 20 minutes. NOTE: Keep in mind that if the cookies don't hold the shapes when baked, freeze the next batch longer.
  12. Repeat the steps with the remaining dough or keep the dough in a sealed plastic bag in the refrigerator for a week or in the freezer for three months.
  13. Preheat the oven at 325°F degree.
  14. Take the dough out of the freezer when it is ready to bake.
  15. Using a large spatula (or a fish turner), take out the dough around the cookie patterns.
  16. Clean the flour or specks of dough with a fine pastry brush.
  17. Bake the cookies exactly 12 minutes.
  18. Take the cookies out of the oven and let them rest for 10 minutes. Then transfer them to a cooling rack.
  19. Once the cookies are completely cool, decorate them with icing (recipe followed).
Cookie Icing
1/4 cup (1 oz) powdered sugar
1/8 tsp. ground cinnamon
1/2 Tablespoon cold water
Natural sprinkles (optional)
  1. Mix all of the ingredients together into a thick paste.
  2. To decorate a cookie, drop a teaspoon of icing onto the cookie and spread it with a spatula.
  3. Add the natural sprinkles if using.

Friday, December 6, 2013

Chocolate Chip Banana Muffins (how to modify a recipe)


Modify recipe is turning out to be my hobby. It's actually pretty fun in a way. Kinda like working in a  science lab. Plus, I always wanted to be a scientist, wearing a lab coat. But in my case, I wear an apron and test real food.

For my family, modifying a recipe would mean that I need to substitute dairy, chicken eggs, legumes, and corn in all of my recipes. The hardest recipes to make changes to are the ones that have a lot of eggs in them. I certainly cannot bake angle food cake without eggs. See what I mean. Some recipes are just impossible to modify.

With any modified recipes, I can taste the difference in taste and texture.  It's really a trail and error.

Because homemade baked sweets taste better within a day or two. I usually cut down the recipes in half. So I only bake just enough for my family.

The time I spend in the kitchen is also a factor when I modify a recipe. Muffins bake faster than bread loaf. Cupcakes bake faster than a eight-inch round cake. Using cupcake liners also means an easy clean up. Plus, my kids can just grab the muffins they want, and no knives, plates, or forks are involved. Less clean up again. Bonus!!! So let's get started and modify a breakfast sweet.

Being on an allergy free diet means very limited selection of food. Nothing is wasted. Bananas are not just healthy snacks. When they are ripen, they are perfect for banana bread. Sometimes I even freeze the over ripen ones for future baking. Ripen ones are perfect to thicken up a smoothie.

I tested many banana bread recipe, and I found William Sonoma's banana bread recipe to be the best after it was modified. It has been my go-to breakfast recipe ever since. The original recipe is written for a bread loaf, but I bake them in muffin pan. My modified recipe is just enough for my family's breakfast or snack, about 6 muffins. Feel free to double the recipe. Notice that I use my kitchen scale religiously, so I added the measurements in ounces as well.
 
William Sonoma's Banana Bread
Original ingredients:
1 2/3 cups all-purpose flour
2 teaspoons baking powder
1/2 teaspoon salt
1/4 teaspoon baking soda
3 medium very ripe bananas, peeled
2/3 cup sugar
1/3 cup vegetable oil
2 eggs
1 1/2 teaspoons vanilla extract

Modified ingredients:
2/3 cups 3/4 cup (3 oz) all-purpose flour
2 1 teaspoons baking powder
1/2 teaspoon salt (I always skip salt in my baking as I really can't tell the taste differences when salt is added or not. My kids and I also eat a lot of potato chips, so I do try to omit salt when I can.)
1/4 1/8 teaspoon baking soda
3 1 (3-4 oz) medium very ripe bananas, peeled (mashed)
2/3 cup 1/4 cup (2.5 oz.) sugar
1/3 cup 3 Tbs. (1.5 oz.) vegetable oil
2 1 (large) egg
1 1/2 teaspoons vanilla extract (since I add cinnamon and nutmeg, I usually omit vanilla extract. The aroma from both spices are enough.)
1/2 tsp grounded cinnamon
1/8 tsp grounded nutmeg
1/4 cup (1.5 oz.) chocolate chips (I add chocolate chips for taste. If you prefer to bake banana muffins, omit the chocolate chips. If you can have nuts, you can add your preferred chopped nuts.)

When a recipe called for melted butter, substitute it with vegetable oil. Liquid vegetable oil is perfect to add into a batter such as pancake batter. If I need to substitute butter that needs to be added into the dough, such as pie crust or cookie dough, I would use coconut oil. 

If you have issue with chicken eggs, substitute 5 quail eggs to 1 large chicken egg. If you cannot have eggs at all, substitute it with the baking powder. The amount of baking powder depends on what I am baking, so this is the time when I need to put on a scientist's hat. Remember not the add more than 1 tablespoon of baking powder in any batter because it does leave a bitter after taste. I highly recommend Kelly Rudnicki's The Food Allergy Mama's Baking Book: Great Dairy-, Egg-, and Nut-Free Treats for the Whole Family especially for egg free recipes.
 
Chocolate Chip Banana Muffins
modified from William Sonoma's Banana Bread
make 6 regular size muffins
 
3/4 cup (3 oz.) all-purpose flour
1 teaspoons baking powder
1/8 teaspoon baking soda
1/2 teaspoon grounded cinnamon
1/8 teaspoon grounded nutmeg

1/4 cup (2.5 oz.) granulated sugar
3 Tbs. (1.5 oz.) vegetable oil
1 large egg
1 (3-4 oz) medium very ripe bananas, peeled and mashed
1/4 cup (1.5 oz.) chocolate chips 
  1. Preheat the oven to 350 F degree. Line the 6 regular size muffin pan with foil or paper liners.
  2. In a small bowl, sift together flour, baking powder, baking soda, cinnamon, and nutmeg.
  3. In a large bowl, whisk together the sugar, oil, and egg.
  4. Add the mashed banana and mix again.
  5. Add the flour mixture and whisk until just combine.
  6. Fold in the chocolate chips.
  7. Using a large scooper, divide the batter equally into the prepared muffin pan.
  8. Bake until the tooth pick inserted into the muffin comes out clean, about 15-20 minutes.
  9. Enjoy them while they are warm. 
Allergy Info: This chocolate chip banana muffin recipe can be made without or is free from dairy, corn, legumes (soy), nuts, or fish.

Monday, November 25, 2013

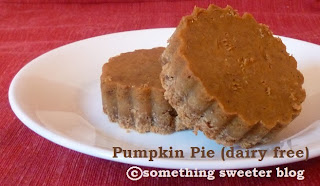
Pumpkin Pie (dairy free)

Last year, I posted a pumpkin pie recipe which had many dairy ingredients. After I found out that Brek still has a dairy intolerance, I had to modified all of my recipes to exclude dairy, including my pumpkin pie recipe.

I made two slight adjustment to my the recipe. Sour cream was replaced with coconut cream. Instead of using butter in the crust, I replaced it with coconut oil.

The pie tasted smooth and melted in your month. Watching Brek gobbled up my dairy free pumpkin pie with no food allergy reactions makes me feels pretty relieve. He can now have something pumkiny sweeter any time.

Pumpkin Pie
serve 6-8

Prep work
  1. Preheat the oven to 350°F.
  2. Line a 8 by 6 (small rectangular) baking pan with parchment paper. Set aside.
For the crust
5 oz. graham crackers
3 oz. coconut oil, melted
  1. Place the graham crackers in a food processor and pulse until finely grounded. (Or crumble the graham crackers by hands.)
  2. Add the melted coconut oil.
  3. Pulse a few times to blend.
  4. Place the crumb in the prepared baking pan.
  5. Using the back of a spoon, press the crumb to pack it, making sure the crumbs come up the side of the pan a bit (like a wall).
  6. Bake for 8-10 minutes. Then set aside to cool.
For the filling
1 (1.7 oz.) large egg
1/2 cup (3.5 oz.) packed light brown sugar
1/2 cup (4.7 oz.) canned pumpkin puree (Libby)
1/2 cup (4 oz.) coconut cream (Aroy-D)
1/2 tsp. grounded cinnamon
1/8 tsp. grounded nutmeg
1/8 tsp. grounded cloves

  1. In a large bowl, whisk together the eggs and sugar.
  2. Add the pumpkin puree. Whisk until smooth.
  3. Add the coconut cream and whisk again until smooth.
  4. Add all of the spices into the batter and mix until combine.
  5. Place the filling over the prepared graham cracker crust.
  6. Bake until a tooth pick inserted in the middle of the filling comes out clean, about 35-40 minutes.
  7. Transfer the pan to a wire rack to cool completely.
Note: This pumpkin pie will have a smooth texture while it is still warm. Keep it covered in the refrigerator. Once their texture is firm to touch, cut them into desired shaped. Drizzle them with melted chocolate for more yumminess.
 

Wednesday, November 13, 2013

Cheese Chips

I discovered making the cheese chips by accident. When I made a dairy free pizza, I used manchego cheese. I know that the manchego cheese is still dairy from sheep's milk, but my kids were dairy intolerance to cow's milk. So the pizza I've been making for them is made with manchego cheese with or without the buffalo mozzarella cheese.

After the pizza baked, I noticed the crispy cheeses that was on the parchment paper and some on the pizza crust. That got me thinking. What if I just baked the manchego cheese by itself. Wonder how that would taste. Oh, to die for!!! The cheese chips tasted nutty and super addicting. Perfect healthy snack for my kids.

I usually make cheese chips after I turn off the oven from baking something sweeter. By using the oven while it's still hot, it is my way of saving money on electric bill. So let me write up two versions on how to make cheese chips.

When buying manchego cheese, I usually pick up the 3-months old. It is half the price per pound to a 6-month or a year old cheese. Ask for the manchego cheese at Whole Foods.

Cheese Chips
serves 2 to 4, depending on how much chips are made

1 small wedge of 3-months manchego cheese

Heated Oven Version
1. Slice the manchego cheese into the same desired shapes, using a peeler.
2. Place them apart on the baking tray lined with parchment paper.
3. Bake in the heated oven until golden brown, about 7 to 10 minutes.
4. Turn the manchego cheese over and continue to let the cheese bake until golden grown, about 5 to 7 minutes more.
Note: If the cheese slices don't seem to bake quickly enough, preheat the oven to 350°F degree. Once the oven is preheated, turn it off and let the cheese slices bake. Keep an eye out as the heat will bake the cheese faster.

Preheated Oven Version
1. Preheat the oven to 350°F degree.
2. Slice the manchego cheese into the same desired shapes, using a peeler.
3. Place them apart on the baking tray line with parchment paper.
4. Bake the cheese slices until golden brown, about 7 minutes.
5. Turn the manchego cheese slices over and continue to bake until the cheese slices are golden brown, about 5 - 7 minutes more.

Keep the cheese chips in a container in the refrigerator for up to 5 days. Reheat them in the microwave for a few seconds.

Allergy Info: These cheese chips are free from dairy (not sheep's milk), eggs, corn, legumes (soy), wheat, nuts, and fish.

Tuesday, October 29, 2013

All things Halloween 2013

Halloween is two days away. My kids' Halloween costumes were completed... way earlier than I expected. Well, I only needed to make Camden's knight armor. Relatively easy.

So I decided to test recipes this week. The first thing I did today was helping Brek with his "Kids' cook off" project. I helped him modified William Sonoma's brownies and made them healthier. He called it The Better Brownies. They were packed with banana, flax seeds, cranberries and spinach. I'll have to post his recipe soon.

Then I asked my kids if they wanted some marshmallows. YES!!! I could hear them say, "What kind of question is that, mommy?" I always ask because I don't want to make anything they don't want to eat.

I made a batch of marshmallow and pipping adventures began.

I saw some meringue ghosts on Pinterest, but I wanted to make them using marshmallow. No luck! The marshmallow was too soft and didn't take shapes. I played with the pipping and made Boo! ghosts instead. Just piped the marshmallow into the ghost shapes on nonstick mat and added the chocolate chips for their eyes and mouths.

I also saw another Pinterest that I wanted to try this year. A pumpkin surprised cake that's when cut, it reveals a pumpkin shaped cake. I wanted to make a cake with a surprised bat shaped cake.

Here's my problem. I don't like to read instructions before I test recipes. So I found out after I baked a devil cake that I should under baked the filling cake. So now I have too much chocolate devil cakes.

I went ahead and tested out my cookie cutter techniques. Ended up with spider web and bats. Wish I have a black cat cookie cutter. I think that would be cute too.

I used melted chocolate chips as the cake's frosting. Melted white chocolate chips to decorate bats' eyes and spider webs.
A few weeks ago, Brek's school was holding a bake sale. Since he is currently on a dairy free diet, he knew there would be no dairy free baked goods. For this lunch that day, I made him a whoppie pie with marshmallow filling.

After I added natural orange sprinkles, I realized how these whoppie pies could sit next to other Halloween treats. With that thought, it is appropriate to add them on this page.

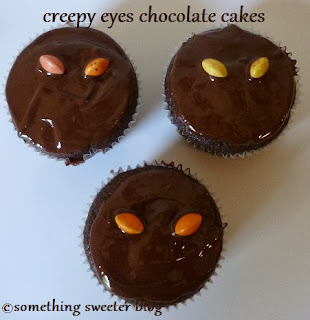
One afternoon, Brek wanted to have chocolate cake for snack. I saw the creepy eyes cupcakes on Pinterest and decided to test out the idea.

They  turned out really cute. I baked my chocolate cupcakes using my chocolate cake recipe. After the cupcakes were cool, I dipped them in melted chocolate. Then decorated the creepy eyes using Sun Drop candy. Fun idea with yumminess written all over.

Caramel... luv you, luv you not! I've made caramel many times. But I never attempted to make the caramel apples before.

Last week, I tested it out, using my dairy free caramel recipe. Total bomb!!! Caramel slid off the apple slices. Then I saw inside out caramel apple slices on Pinterest and really thought this idea would work.


I gave the inside out caramel apple a try, using my dairy free caramel recipe. After the caramel was set, I sliced it and that was it. Trouble! Caramel didn't stick on the apples... again. The sweet caramel was a perfect contrast to the sour Granny Smith apple slices.

Just wish I know why the caramel didn't stay on the apples. Maybe it was my homemade caramel. I will have to try again until I get it right. It will be my caramel apple challenge.

I saved a little bit of caramel and cooked it longer to make them into caramel lollipops. The melted chocolate drizzled on the pops was inspired by my friend's photograph of her caramel apple slices.

Halloween is incomplete without a Halloween school lunch. A few months ago, I found a smoke salmon sushi rice balls on Pinterest. Since I can't pack anything creamy without being in a container, I knew right away that I couldn't do spider web sushi rice balls.

This time, I read the instruction on how to make the Jack-O-Lantern sushi rice balls. Super easy! My kids also made their own smoke salmon Jack-O-Lantern sushi rice balls for dinner. If you and your kids luv sushi, this would be a fun activity to do.

Well, it's been fun cooking and baking for Halloween this year. A lot of ideas from Pinterest. Check back next year for more of something Halloween sweeter from my kitchen.

Wednesday, October 16, 2013

Halloween Ghosts, Skulls, and Bones


What is not to like about Halloween? Well, we are not religious, so Halloween to us is pure fun. Dressing up. Lots of something sweeter. For me, it's an excuse to be a kid again.

I used to make my Halloween costumes and dressed up as a sci-fi warrior twice. I'm sucker for sci-fi movie. Then I was a rainforest tribal warrior. The movie Emerald Forest inspired me to sew fake leaves on my dress and boots and carried a big wooden stake. 

Now that I'm a mommy, I decide that I'd make my kids' Halloween costumes too. Last year, Camden was old enough to decide what he wanted to be, The Cat in a Hat. But he said, "No hat. Just a red bow." Brek was the Ninja Go's green ninja. I had a lot of fun making their costumes. I'm not really sure what to make for them this year. Camden keeps changing his mind from Scooby Doo to Jerry the mouse to Robot to cowboy. Brek wants to make his own costume (out of bed sheets). But whatever their costumes will be, there is that something sweeter I luv to make for my kids while Halloween is approaching.

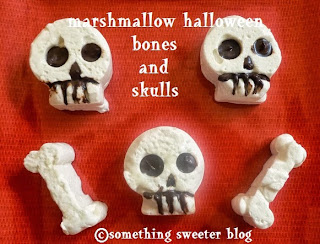
While I was at Target's One Spot, I found the skull and bone moldRight away, a vision of marshmallow treat comes to me. I also thought of making marshmallow ghosts because I don't want to use food coloring in my sweets. Something white like ghosts would be easiter to make than orange Jack-O-Lantern. The brownie pop mold is a perfect product to use for this Halloween project because of the roundness of the ghosts' heads.

Use my maple syrup marshmallow recipe and fill the molds with freshly whipped marshmallow. Be sure to spray the molds with cooking oil for easy release. Once the marshmallow dries, decorate the skulls and ghosts with melted chocolate.

Have fun dressing up. Eat something sweeter. Whether it's a trick or a treat, remember one thing, Halloween means... more holidays are coming up... Thanksgiving, Christmas, New Year, Valentines. Oh man, I see a lot of something sweeter projects coming my way.

Allergy Info: My marshmallow recipe is free from or can be made without dairy, eggs, corn, legumes (soy), nuts, wheat and fish. If you are sensitive to corn, be sure to find corn free pure maple syrup.

Friday, October 4, 2013

Allergy Info... what is it all about?

A few days ago, a new member posted on corn free support group in hope to get reactions for his wife's baked goods that could be for sales. He didn't get a warm reception at all. It was a combination of the posted picture of corny sweets and the not knowing the ingredients his wife used to bake with were actually not 100% corn free.

It occurred to me that I needed to post a blog to clarify what is the Allergy Info that I ended with on all of my recipes actually mean. So here goes.

Everybody's intolerance to food is different. Keep that in mind when you bake for yourself, your family, or your friends. I just discovered a few months ago that Brek definitely has dairy intolerance. By how much, I don't know. However, he can have sheep's milk products, such as yogurt or manchego cheese, with no allergic reactions. I know this much that he can have a small scoop of ice cream made from cow's milk or cream. But last week, we went out for mozzarella pizza. He ate two slices, came home, and threw up two hours later. Since I am the one who diagnosed his dairy intolerance, I will never know what exactly in the dairy he is allergic to. I mentioned this to my friend whose child (same age as Brek) also has dairy issue. I suggested that she cooks and bakes with sheep's or goat's products. Since her son is allergic to casein, she said it is found in sheeps and goats too. Well, that was a revelation.

I also make suggestions on products in my recipes. In the beginning stage of my allergy free diet adventure, I was baking with organic all purpose flour. Oh man, was that expensive. When I switched to regular all purpose flour, I noticed the texture of my sweets were different. Not all flours are created equal. Even though I suggested a product next to an ingredient, it doesn't mean you have to use the product. Just keep this in mind that if your sweets don't turn out well, adjust the ingredients next time.

The products also change as time goes by. There was one brand that carries corn free mandarin oranges. As of today, that brand is no longer corn free as I saw citric acid added in the ingredients. So I always read the ingredients listed on the package.

Allergy Info

Dairy: When my recipe indicates that it is free from dairy, I always mean that the dairy is from cow's products such as cow's milk, butter, heavy cream, hard or soft cheese. Most of the time, my dairy is from sheep, such as sheep's milk yogurt or cheese (manchego).

Eggs: Most of my current recipes will have chicken eggs. Sometimes I do use quail or duck eggs. If so, the free from eggs would be written as "free from chicken eggs". If there are no traces of eggs at all, then it would be written as "free from eggs". If you can have quail eggs but not chicken eggs, substitute 5 quail eggs for 1 chicken egg. I stay from duck eggs when making something sweeter as they taste gamey to me. Plus, duck eggs are HUGE!!!

Corn: This is a tough one. I don't often declare that my recipe is corn free because my kitchen, the ingredients I use, the products in my home may not be corn free. With that said, all of my recipes can be made corn free with your corn free ingredients.

Legumes: Have you ever heard somebody said that they or their kids are allergic to peanuts, thinking that peanuts are from the nuts family? No, no, and no!!! Peanuts are legumes. I knew this only because Camden has G6PD and needs to avoid all legumes, such as peanuts, all types of beans, especially fava beans. I used to bake with tofu, but I decided to omit it in all of my cooking and baking. If the recipe asks for tofu, I substitute it with mashed banana. My sweet recipes are most likely legumes free.

Wheat: I use only gluten flour such as King Arthur's all-purpose flour or bread flour. Even though the texture and taste may changed, gluten free flour may be used as a substitute. If I test a recipe with gluten free flour, I will note it on the Allergy Info section. Keep in mind that gluten is not created equal in all flours and the brands. I find good results with King Arthur's flours.

Nuts: My family and I have no nuts allergy. But my kids are not nuts fan. I should let them go gather nuts for Earl (our backyard squirrel). If you have nuts allergy, omit the nuts ingredients or substitute with seeds. Most of my recipe calls for coconut milk, coconut oil, or coconut butter. If I use coconut milk or oil in my recipe, the Allergy Info on nuts would be written as "nuts (not coconut)".

Fish: No fishy allergy here either. But seriously, who add fish in their something sweeter? Not me!!! I do cook savory meals with fish sauce. Soy sauce or sea salt can be substitute for fish sauce.

Remember, if you have any question about my recipes, please feel free to contact me. I will be happy to answer and help you create your very own something sweeter. Happy baking!!!

Thursday, October 3, 2013

Flour Tortillas

If you read my blog on The Endless Possibility of a Pizza Dough, you'd have known that my 2011 New Year's resolution was "to master the art of bread making". With a lot of practice, I did master the art of bread making. But let me tell you, there were times when I was so frustrated that the bread didn't turn out. Loaf bread is the hardest to bake. The dough has to rise correctly. The dough has to be baked at the corrected oven temperature. I mean, one little thing off and poof... no beautiful loaf of bread.

A few times, I had the urge to grab a bag of flour tortilla at my local supermarket. Of course, I couldn't do that because of the strict allergy free diet I was on at the time. Watching the fresh and puffy tortilla came out of the tortilla machine made me drool.

When I came across several recipes for flour tortilla, I was surprised that they are non yeast dough. The whole process of making yeast bread is pretty easy (if it doesn't involved loaf bread) but it is time consuming. Without yeast in the flour tortilla, my future of bread making is looking rather bright.

I tried several recipes and decided to come up with my own healthier version with the added grounded flax seeds. Not only is flax seeds are good for you, but they add to texture and color to the flour tortilla.

What do I do with the flour tortilla? Let me count the way. Addictive something sweet: deep fried stripes of tortilla and drench them in cinnamon sugar. Second round something savory: pulled pork tortilla. On-the-go breakfast: breakfast tortilla with scrambled eggs and whatever I have on hands. Something fast: quesadilla of whatever I have in the fridge (grilled salmon, ham, or grilled chickens with manchego cheese). Or what my kids luv to do: "Mommy, can I have just tortilla?" Seriously, they luv them plain.

Flour Tortillas
makes 6 - 10 six or eight inch (somewhat round) tortilla

1/2 cup (4 oz) water
2 cups (8 oz) unbleached all purpose flour
1 to 2 Tablespoons grounded flax seeds
1 teaspoon sea salt
1/4 cup (2 oz) vegetable oil
  1. Pour the water in the mug and microwave it until it is hot, about 45 seconds.
  2. In a large bowl, whisk together the flour, grounded flax seeds, and salt.
  3. Add the hot water into the flour mixture and combine it with a fork.
  4. Add the oil and mix again with a fork until the dough is formed.
  5. Take the dough out of the bowl and knead it for 1 to 2 minutes.
  6. Place back into the bowl and let the dough rest for 15 to 30 minutes.
  7. Heat the flat griddle on medium low heat.
  8. Take about a golf ball size dough and with a rolling pin, roll it out thinly in a circular form. Doesn't have to be perfect because they still taste delish. Mine seems to take a square shape.
  9. Place the rolled out dough on to the heated griddle.
  10. Cook the dough for 55 to 60 seconds per side. Adjust the heat as needed.
  11. Place the flour tortilla on a plate and cover it with a  towel to keep warm.
After the tortillas are cooled, keep them in a plastic bag or an airtight container for up to 3 days at room temperature. Keep them in the refrigerator for a week. Freeze them for up to 6 months.

Allergy Info: My flour tortillas recipe is free from or can be made without dairy, eggs, corn, legumes (soy), nuts, and fish.

Sunday, September 15, 2013

Chicken Lunch Meat

The hardest part of being on a food allergy diet was finding allergy free prepackaged food. I mean, seriously, must I make everything from scratch all the time? The answer is YES. Finding one product without corn is like finding a needle in a haystack. Literally.

I had the hardest time finding corn free lunch meat. Once I found lunchmeat with questionable ingredient: lactic acid (non dairy). I thought it was corn free. After calling a company and spoke to the customer service staff, the non dairy lactic acid actually came from corn.

During my free time, you will find me scanning a cookbook after a cookbook. My house is full of cookbooks. I've bought them at Half Price Books. I've borrowed them from the library. It was my luck when I scanned through Into the Vietnamese Kitchen by Andrea Nguyen. In this cookbook, there was a recipe called multi purpose meat paste. I remember the precooked pork rolls that are sold in Asian markets, but those pork rolls have MSG and other ingredients that I cannot pronounced. After reading the ingredients listed for this recipe and instruction on how to make it, I was pretty sure this recipe was for the pork roll.

So one weekend, I braved myself and made the rolls, using chicken meat. I was dumbfounded at how easy it was to make the chicken rolls. Plus, it was a perfect substitute for lunch meat too. My mom even told me that she amazed with the familiar taste of the chicken rolls. Remember, it is always made with cleaned ingredients that I can pronounce. Another product that I successfully made from scratch. Take that one off to-make list. I haven't tried this recipe with pork, beef, or fish. I'm pretty sure it can be done. One day I'll give other meat a try with this recipe. I've made this chicken lunch meat with just chicken breasts many times. Still taste great and perfect as an on-the-go lunch meat.

Chicken Lunch Meat
adapted from Into the Vietnamese Kitchen by Andrea Nguyen
makes 4 rolls

1 pound skinless, boneless chicken breasts
1 1/4 pounds skinless, boneless chicken thighs
1 Tablespoon baking powder
2 Tablespoons tapioca starch
1 Tablespoon sugar
5 Tablespoons fish sauce
3 Tablespoons vegetable oil
  1. Cut the chicken meat into chucks.
  2. In a large bowl (with a cover), combine the rest of the ingredients.
  3. Add the chickens and coat well.
  4. Cover the bowl and place it in the refrigerator to marinade for 8 hours or overnight.
  5. Using a food processor, grind the chicken meat into paste.
  6. Divide the chicken paste into four equal parts.
  7. For each roll, place the chicken paste on to the banana leaf and form it into a big log. Note: Banana leaf is sold at Asian market in a freezer section. Thaw before use but keep them frozen. If banana leaf is unavailable, place the meat paste right on to the foil and roll into log as directed.
  8. Roll the banana leaf over the chicken paste and shape into a fat log.
  9. Place the banana leaf over the foil and roll it tightly. NOTE: At this point, the chicken paste rolls can be kept in the freezer for up to a year.
  10. To cook it, bring the water in a 4-quart pot to a boil.
  11. Add the chicken paste roll (still wrapped in foil) into the water. It should float in the boiling water.
  12. Cook it for 30 minutes, turning once. NOTE: Sometimes the roll is stubborn and won't flip over. Use the tongs to keep it in placed. The roll will plum up when cook. Don't poke a hole or anything like that. It won't burst. Promise. The roll shrinks after it cools down.
  13. Once cooked, remove the roll and place it on a plate. Let cool.
  14. Unwrap the foil and the banana leaf.
  15. Slice the chicken lunch meat thinly. Enjoy them with bread, noodle soup, or just eat them as snack. Keep the cooked chicken lunch meat in a container in the refrigerator for up to 5 days.
Allergy Info: My chicken sandwich lunch meat is free from or can be made without dairy, eggs, corn, legumes (soy), nuts, and wheat.

UPDATE: For those of you have corn sensitivity, I want to let you know that some or maybe all banana leaves maybe dusted with corn starch. I recently bought another brand. After washing the banana leaves and separating them before I refreeze them again, I noticed white paste when I was setting them out to dry. I wasn't 100% sure if the white paste was corn starch and never called the company to confirm. But my instinct told me that it had to be something starch. With that said, you can still make the chicken lunch meat. Just use double foil when rolling up the chicken paste. The lunch meat won't have the aroma from the banana leaf but at least you will be able to eat them without getting corn allergic reaction.

Monday, September 2, 2013

School Lunches


Photo 1. Human Body
As soon as August rolled in, I started to see a lot of blogs about school lunches. So I decided to write a blog about my son's lunches.

I homeschool my kids, but Brek's been going to a private school for homeschoolers on Tuesday and Thursday. On the days he stays home, he works on the assignments with me and his daddy.

It is very difficult for me to think of what to pack for Brek's lunch. I'm so thankful that he only goes to school two days per week because I cannot imagine packing his lunch every day.

Photo 2. Superhero Sandwiches
The first year Brek attended school, he was in 3rd grade.

School lunch wasn't available, and it had something to do with a licensed commercial kitchen that the school staff didn't have access to. Microwave was available and was very helpful if I had to send lunches that needed to warm up.

I really didn't know what to pack for Brek's lunch during his first school year. As it turned out, he mainly had boring sandwiches for lunch. They were probably soggy in a plastic bag. Poor kid.

Before Brek started 4th grade, I was determined to pack him a better lunch. I searched online for school lunches and noticed how some bloggers used really cool lunchboxes.

Photo 3. Hot Dog Rolls
The lunchbox that caught my attention the most was from the PlanetBox. It's stainless steel, and it's like a laptop with different size segmented containers. As soon as they were on sales, I bought two Rovers. Money well spent.

Each time I pack his lunch, I can see how the food is arranged in different colors. So his lunch might be regular sandwiches, but they were in fun shapes. This was the time when I started to document his lunches by taking pictures and posted them on my personal Facebook page as future references.

Photo 4. Brisket Steamed Bao
When Brek entered 5th grade, I noticed that superhero shape sandwiches were not cool any more. He wanted the food he would normally eat at home. This meant that I had to pack him lunches that he would need to be heated up in a microwave.

If at all possible, I tried to come up with a theme lunch. Just to make it fun. Instead of farm animals or superhero shapes, I would stick with mathematical shapes like square or circle. Sometimes I sneaked in fun shaped sandwiches anyway. Just because....

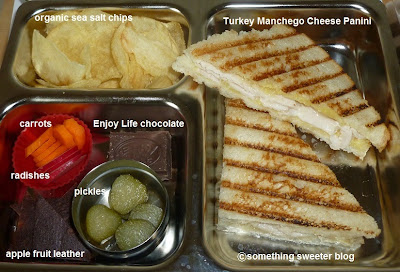
Photo 5. Turkey Manchego Cheese Panini
This year, Brek is in 6th grade. (I still have teary eyes just thinking how big he's gotten.) I bought him a bigger size PlanetBox called Launch. The main lunch segmented container is bigger which gives me more room to pack him more of the main meal.

I always ask Brek what he wants for school lunch. Let's face it. If I pack something he doesn't like, he probably won't eat it. That would be a waste of my time and a hungry kid during school day.

I also check his lunchbox to see the leftovers. If his lunchbox is empty, whatever I pack for him that day is worth repeating. And if I see anything left in his lunchbox that is not eaten, I usually ask him what is wrong with it. Most of the time, he says he's full or he doesn't like it. Beets can be pretty spicy, so I don't mind if he doesn't eat it. I still add them as part of his lunch, hoping he would at least take a bite. And he always takes ONE bite.

Photo 6. Smoked Salmon Sushi Rolls
Over this summer, I found out that Brek has dairy intolerance. To compensate for the non dairy sweets, I'd make him something sweeter for his lunch. Chocolate in his lunchbox is a must... for caffeine fixed, especially on a test day.

Remember that if the food is difficult to eat, you can bet he won't eat it. Slice fruits or vegetables into slices, coins, or sticks so they are easy to handle. Cut sandwiches into small pieces for an easy pick-me up.

Hope you are inspired to make your own lunch or for your love one. Let me know what is in your lunchbox lately.


Photo 7. Quesadilla
Photo 1. Human Body: pizza bones, crunchy radishes, carrots, and chips, bloody color from pomegranate seeds, CRUNCH bar (leftover from Halloween treats)

Photo 2. Superhero: This was Brek's first day of school lunch (4th grade). Packing lunch comes with experience. Notice the lack of colors in this one. The colors improved with time. I bought many pressed cookie cutters. More fun than just a regular cookie cutter.

Photo 3. Hot Dog Rolls: I made the rolls using the bao dough. They were baked until golden brown. I also baked ham and manchego cheese rolls using the bao dough too.

Photo 4. Brisket Steamed Bao: The brisket was leftover from dinner. I steamed bao bun as a bread alternative to the sandwich white bread.

Photo 5. Turkey Manchego Cheese Panini: This was Brek's first day of school lunch (6th grade). Instead of having a boring sandwich, I pressed it in the grilled pan to have the pretty grilled mark.
Pretty presentation helps. Homemade flour tortilla.

Photo 6. Smoked Salmon Sushi Rolls: Brek's favorite lunch is smoked salmon sushi rolls. I gave him more sushi rolls than I did last year. Since this was sea food theme, I added shrimp chips to stays in the sea food theme. Shrimp chips are available at Asia markets but read the label to avoid MSG.

Photo 7. Quesadilla: For this quesadilla, I added shredded goat cheddar cheese with crab meat. I coated pretzels with non dairy melted chocolate then added all natural sprinkles to make them more colorful. The silicon cupcake liners were used to hold the sweets and veggies. Plus, they made his lunch looked pretty colorful.

Allergy Info: As of this writing, Brek has dairy intolerance to cow's products. He can have goat or sheep's milk product. Be sure to prepare lunches according to your food allergy diet.

Tuesday, August 27, 2013

Candied Bacons

When Camden turned one year old, his weight plateaued. When he had his two year old checkup, his weight didn't change. So his pediatrician suggested that I visit with a nutritionist. During the visit, I was very proud to show her Camden's food journal. After all, they were healthy homemade allergy free diet. BUT she said that the food I gave him was very high in carb. She suggested that I adjusted his diet with more protein food. That was when I started to think about what high protein meals I could make. He loved to snack so what about snacks?

I made a lot of changes to his diet, from making beef broth to adding quinoa to jasmine rice. Making high protein snacks was a challenge. I remember the nutritionist suggested giving him bacons, ham, etc. But the corn free ones were hard to find. When I found out that Whole Foods 365 bacons was corn free, I was thrilled. Their bacons, as it turned out, weren't salty or anything special. Tasted like cooked fatty meat. Pretty boring!!!

While I was watching Unique Sweet (as I always do to be inspired), there was an episode that showed candied bacon cupcakes. Ouuu... sounded interesting. There was no recipes, just a quick description that the bacons were sprinkled with brown sugar then cooked in the oven. The sugar caramelized the bacons to crisp and to have that candied texture.

I decided to test it out, and the bacons were super addictive. They were sweet and crisp. Just like candy. Of course, I didn't write down my method of cooking the candied bacons. I just winged it every time. I burned about five batches along the way. After reading a few cookbooks on candied bacons and watching cooking shows on how to cook bacons, I came up with my own simple steps. Give my recipe a try and don't blame me if you eat the whole batch of candied bacons all by yourself. They really are addicting.

Candied Bacons

1 lb bacon slices
6 Tablespoons light brown sugar
  1. Preheat the oven to 400°F degree. Place a baking rack over a baking tray. Set aside.
  2. Spread the light brown sugar on a plate.
  3. Coat each bacon slice with light brown sugar.
  4. Arrange it on the baking rack.
  5. Repeat step 3 and 4. Note: Cooked bacons do shrink. Arrange them as close together as possible but not overlapping them. If I don't have enough room for the last 4 to 6 slices, I just add them after the first 10 minutes of cooking.
  6. Cook the bacons in the preheated oven for 20-30 minutes, turning each bacon slices every 10 minutes. Note: If the bacons are thin slices, they will cook faster, about 20 minutes. Keep an eye out on the bacons, so they don't burn.
  7. Once cooked, remove the bacons to a plate to cool. Do not leave them on the rack to cool or they will be difficult to remove. Enjoy them or keep the candy bacon in a tight container in a refrigerator for up to 5 days.
Cooking Note: In a hurry, cook the bacons under a broiler on HIGH or LOW setting. Whatever setting the broiler is on, keep an eye on the bacons. Every 2-3 minutes, you must check on them, or they will burn. I burned too many batches with this cooking method, but they cooked faster. I prefer to cook them as noted on my recipe above when I have more time (like while I'm having dinner or doing dishes).

Microwave bacon slices is another method of cooking candied bacons in a hurry. Placed bacons slices on top of microwavable plate lined with paper towel. Generously sprinkle light brown sugar on top of bacon slices. Place another paper towel on top of the bacons and microwave until crisp, 2 - 3 minutes. The bacons will be crispy after they are cool.

Keep in mind that the bacons will taste crispy the day they are cooked. I usually heat them up in the microwave for a few seconds. Not as crispy but chewy candied bacons.

Allergy Info: My candy bacon recipe is free from or can be made without dairy, eggs, corn, , legumes (soy), wheat, nuts, and fish.

Saturday, August 17, 2013

Marshmallow Fluff or Creme

Making marshmallow is super easy. Give my maple marshmallows recipe a try. Guess what's the best part of making these marshmallows? Licking the marshmallow right after it's whipped. The smooth, silky, and soft texture reminds me of marshmallow fluff. I always wondered if I could make the marshmallow stays fluffy for maybe a day or two. I tried making marshmallow with less gelatin, but with no luck. The marshmallow only stays fluffy for about five minutes.

When I ventured to supermarkets, I looked for a prepackaged marshmallow fluff. Found two brands. Both had questionable ingredients... corn syrup (GMO?), vanillin (fake vanilla?), artificial flavor (engineered marshmallow flavor?), artificial color blue (hmm... isn't marshmallow suppose to be white?). This is a very typical of my findings. Most of the prepackaged products have at least one questionable ingredient. With that said, I always end up making or baking something I've craved.

I definitely appreciate the authors who shared their recipes that can be made from scratch. When I came across Real Snacks: Make Your Favorite Childhood Treats Without All the Junk by Lara Ferroni, I was psyched. Finally, I can make and bake my kids' real snacks without additives I find in the prepackaged counterparts. The one recipe I was intrigued with was her marshmallow creme.

Here's what I noticed. When whipping meringue, the egg white mixture must be stiff peaked. The texture for marshmallow creme is actually at soft peak. I also was wondering about eating raw eggs. I researched this subject to make sure that I didn't food poison my kids. I found out that if a sugar mixture boiled at a high temperature and is added into the egg white, the egg white is cooked as it is being whipped. Another method is the same as making the seven-minute frosting where egg whites with other ingredients are cooked over a double boiler while whipping to soft peak.

Keep in mind that this marshmallow fluff or creme will separate, meaning that the sugar syrup will separate from the whipped egg white. When this separation happens, just whisk the fluff a few time before using. I only keep marshmallow fluff in the fridge for about three days. I usually use one large chicken egg white to make just enough for my kids' afternoon snacks. Feel free to double or triple this recipe and adjust the sweetness to your liking.

Marshmallow Fluff or Creme
adapted from Real Snack's Marshmallow Creme
serves 2-4

1/2 cup (4 oz) sugar
1 Tablespoon (0.5 oz) pure maple syrup
1 1/2 Tablespoons (1.5 oz) water
1 large egg white
  1. In a small pot, clip it with a candy thermometer.
  2. Add the sugar, maple syrup, and water into the pot.
  3. Whisk until just combine.
  4. Bring the mixture to a boil and lower the heat until the candy thermometer registers at 235°F degree.
  5. While the sugar mixture is heating, whip the egg white until foamy, about 30 seconds.
  6. When the sugar mixture registered at 235°F degree, slow add it to the egg white while the hand mixer is on a low speed (speed 1 if using Cuisinart HM-70 Power Advantage 7-Speed Hand Mixer).
  7. After all the sugar syrup is added, increase the speed to high (speed 6).
  8. Whip until the egg white is at soft peaks.
  9. Keep it in the tight container (mason jar) for up to 3 days.
Allergy Info: My marshmallow fluff is free from dairy or can be made without dairy, corn, legumes (soy), wheat, nuts, and fish.