Saturday, July 4, 2015

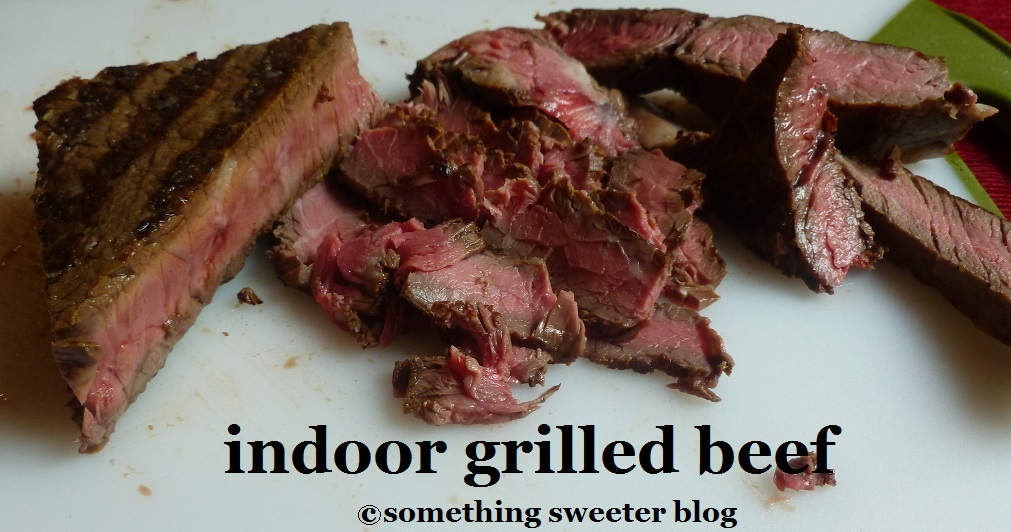
Indoor Grilled Steak

I hardly ever make meals using any type of beef. For one thing, it's really difficult for me to cook the beef tender enough for my kids to enjoy. 

When Camden said he wanted beef for dinner, I was browsing for a beef cut at a local grocery store that very day. I asked the staff regarding the cut and he suggested Kobe beef. But that was $14 per pound. Yikes!!! So he recommended the second best, top sirloin steak, which was about $7 per pound. Ok, that was reasonable. I bought a slice, took it home, and really didn't know what to do with it. I decided to just grill it indoor. The beef came out juicy and tender. We were all able to enjoy it.

The second time I grilled it, it came out too raw. Must be a thicker cut. So I cooked it longer. Then it was too well done and was too dry. I asked my husband, the grill-master in his own right, about the cooking time. He told me not to over cook it. So I began my adventure of perfecting an indoor grill steak.

A few things to remember. Before starting the indoor grilling, I make sure all the bedroom doors are closed. If the outside temperature is nice, get those windows open to get the smoke and the grilled smell out of the house. I've noticed that the smell won't linger.

Now let's get back to that steak. Be sure to set the steak at a room temperature. This way the middle of the steak won't be too cold when grill. I usually buy the steak and grill it that very day, so I never had to go through this step. Another thing is to make sure the grill pan is super hot. I want to sear the outside but warm and cook the inside.

Flavor the beef with only salt. I learned this technique from Tyler Florence. Because ground black pepper can burn in a hot grill pan, sprinkle it after the steak is cooked.

Timing is another factor. Depending on the thickness of the cut, I grill 4-5 minutes on the one side. After flipping it, I cook it for another 3-4 minutes. If I notice that the steak is too raw, I'd slice it thinly then zap it in microwave for 30 seconds.

Last but not least, let the steak rests. The steak will continue to cook and will come out perfectly juicy and tender. My kids and I prefer thin slice steak.

Now what are you going to do with the perfectly grilled steak???

Indoor Grilled Steak
serving 4-6 (for us, this makes about 3 meals)

1 pound USDA or grass-fed top sirloin steak
sea salt
cooking oil spray
freshly ground black pepper
  1. Heat the grill pan on medium to high heat about 5 minutes.
  2. Deliberately salt the steak on both side.
  3. Spray the grill pan with cooking oil.
  4. Turn the oven vent on HIGH.
  5. Place the steak on the preheated grill pan.
  6. Grill it for 4-5 minutes.
  7. Flip and grill the other side for another 3-4 minutes.
  8. Place the grilled steak on a plate.
  9. Sprinkle ground black pepper on one side of the steak.
  10. Cover steak with a large bowl and let it rest.
  11. Slice the steak thinly and serve with your favorite sides. TIP: We eat them with tortilla, steamed or sticky rice, rice pilaf, and other veggies and fruits.
STORING: Keep the grilled steak in a container in the fridge for up to 5 days.

Allergy Info: This grilled beef is free from or can be made without dairy, eggs, corn, legumes (soy), nuts, wheat), and fish. Keep in mind that not all sea salt is corn free. Research and use the corn free brand. Also get a grass-fed cuts as they are most likely corn free and not that much more expensive than USDA cuts.

Monday, June 29, 2015

Mississippi Mud Cupcakes

While reading one of Baked cookbooks, I came across their Mississippi mud pie. Not only the picture of the pie looked so pretty, but the recipe itself was very inspiring. I thought and thought about how to modify their recipe to dairy free and came up with a solution.

Since I already made dairy-free brownies and chocolate pudding, I knew I could made this pie for my kids. For cookie crust, I used my cream filled cookie recipe. Keep in mind that there would be plenty of leftover cookie dough to make regular chocolate cookies. They freeze well so no worries. Creamy filling is not needed. If you wonder about the whipped cream, no worries. Most of the recipes that ask for whipped cream toppings, I usually substitute them with my marshmallow fluff.

There are a lot of recipes that go into these Mississippi mud cupcakes. So plan accordingly. I bake cookie and brownies in the morning. While those are baking, I make chocolate pudding and place it in the fridge to cool down. When I'm ready to serve the cupcakes, I whip up a fresh marshmallow fluff. I assemble the cupcakes then call for my kids to devour. Afternoon snack done... and messy!!!

Mississippi Mud Cupcakes
inspired by Baked Explorations' Mississippi mud pie
makes 6 regular size cupcakes

Cookie Crumbs
1/2 cup of my chocolate cookie dough recipe

Brownies
1 recipe of my brownie bites recipe, without the nuts and chocolate chips

Chocolate Pudding
1 recipe of my chocolate pudding recipe

Marshmallow Fluff
1 recipe of my marshmallow fluff recipe
  1. Preheat the oven to 350F degree. Line the muffin pan with foil liners. Set aside.
  2. Make the chocolate cookie dough as directed.
  3. Place 1-1 1/2 Tablespoons of cookie dough into each foil liner.
  4. Using the back of the Tablespoon, press the dough into the bottom, bringing the dough up to the side.
  5. Bake the cookie dough in a preheated oven for 8 minutes
  6. While the cookie is baking, make the brownie batter as directed.
  7. When the cookie is baked, take it out and let cool for at least 10 minutes.
  8. Using a small scooper, divide the brownie batter evenly on top of each baked cookie.
  9. Bake in a preheated oven until the toothpick inserted comes out clean, about 15 minutes.
  10. While the brownies are baking, make the chocolate pudding and marshmallow fluff.
  11. Place them in the fridge to cool down. TIP: Chocolate pudding can be made a day in advance, keeping it cold in the fridge. It's best to whip up fresh marshmallow fluff when ready to serve.
  12. After the brownies are baked, set it aside to cool completely.
  13. Place the chocolate pudding in a piping bag and pipe it on top of each brownie.
  14. Top each chocolate pudding with marshmallow fluff. Enjoy.
STORING: Because the marshmallow fluff may separate, these Mississippi mud cupcakes taste best on the day they are made. Without marshmallow fluff, the cupcakes can be kept in a container in a fridge for up to 3 days. With out both pudding and marshmallow fluff, the cupcakes can be kept in a container at a room temperature for 3 days.

Allergy Info: These Mississippi mud cupcakes are free from dairy, corn, legumes (soy), nuts, and fish. I made these Mississippi mud cupcakes while my kids were on dairy and legume free diet. Eggs were not questionable in their diet back then. If you want to make these cupcakes egg free, make slight changes to the listed recipes. For the chocolate cookie dough, substitute 2 tablespoons of applesauce for a large egg. For the brownie bite recipe, substitute 2 teaspoons of baking powder for a large egg. Chocolate pudding is egg free. Use my maple syrup marshmallow recipe instead of marshmallow fluff. See, just because you have a strict diet doesn't mean you can't have something sweeter. Enjoy.

Monday, June 22, 2015

Hazelnut Chocolate Chip Cookies (dairy and egg free)

Since Camden's started an egg-free diet, I went over all of my recipes and retested them using absolutely no eggs. It wasn't as difficult as I thought it would be. I mean, the last time I baked without eggs was when he was a baby. Then I added quail and duck eggs into this diet when he was over a year old. But to not have eggs in any baked sweets at all? Perplex, right?

I started off easy. Chocolate chip cookies. Then I tested the cookie dough with nuts, dried fruits, even freeze dried fruits, like my strawberry cookies.

After testing different combinations for awhile, I came to luv hazelnut flavor the most. The hazelnut flavor pairs well with chocolate. And then the hazelnut aromatic brings it to another level. Ok enough said. Let's bake some cookies.

I bake just hazelnut cookies for my kids' nighttime snack. Because they don't allow to eat chocolate after 5pm, they can still have these cookies without the caffeine.

Hazelnut Chocolate Chips Cookies
makes 16

1/4 cup (2 oz.) palm shortening
1/4 cup (1.8 oz.) light brown sugar
1/4 cup (1.8 oz.) granulated sugar
2 Tablespoons (1.4 oz.) unsweetened apple sauce
1/2 cup plus 1/3 cup (3.7 oz.) all-purpose flour
1/2 teaspoon baking soda
1/2 cup raw or roasted hazel nuts, roughly chopped
1/2 cup semi sweet chocolate chips or chunks
  1. Preheat the oven to 375F degree. Line a baking pan with parchment paper or nonstick matt. Set aside.
  2. In a large bowl, mix together the shortening, sugars, and apple sauce with a hand mixer until creaming.
  3. In a small bowl, whisk together the flour, baking soda, nuts, and chocolate chips or chunks.
  4. Add the flour mixture to the shortening cream.
  5. Mix it with the hand mixer until just combine.
  6. Using a small scoop, scoop the cookie dough on to the prepare pan, making sure they are about an inch apart. TIP: I bake about 8 at a time and freeze up the rest of the pre-scooped cookie dough.
  7. Bake in a preheated oven for exactly 12 minutes.
  8. Allow the cookies to cool on a pan for 5 minutes then transfer them to a cooling rack to cool completely. Enjoy!!!
STORING: These hazelnut chocolate chip cookies can be kept in an air tight container at a room temperature for up to 3 days.

Allergy Info: These strawberry cookies are free from or can be make without dairy, egg, corn, legumes (soy), and fish.